
If you spend a large part of your day seated at a desk, you may experience tight hips.
“The human body is designed to transfer movement from one joint to the next, so when you have joints that are limited by mobility, stability, or strength, you open yourself up to a higher risk of injury,” says Cody Braun, C.S.C.S.
These hip mobility exercises can help you increase your hip mobility, loosen tight muscles, lessen your risk for injury, and even reduce pain caused by long periods of sitting.
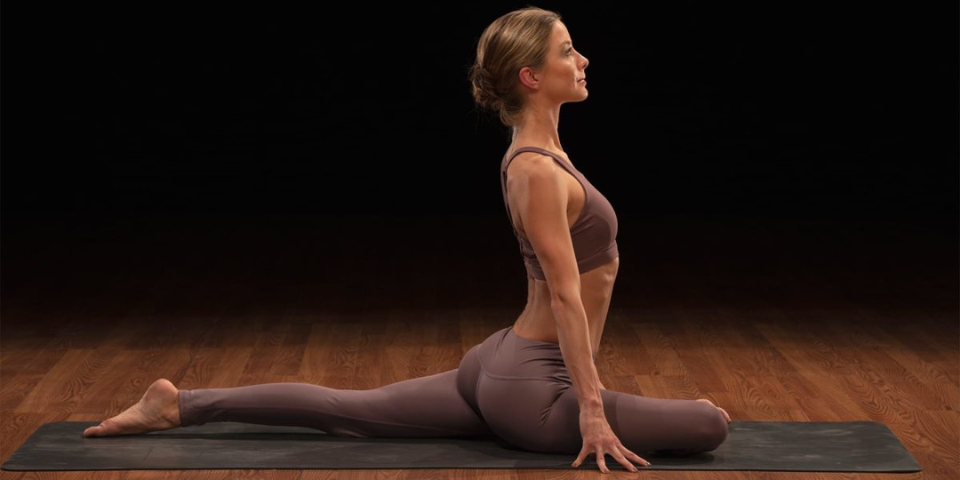
1. Pigeon
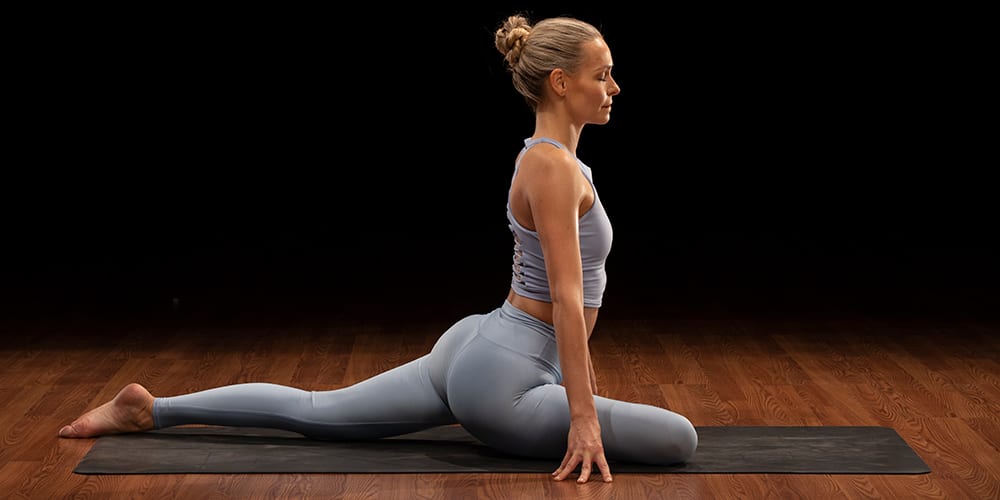
- Get on all fours, with your hands shoulder-width and knees hip-width apart.
- Bring your right knee forward, placing it on the floor behind your right wrist.
- Slide your right ankle toward your left wrist, so your right shin crosses your mat at a comfortable angle.
- Extend your left leg straight back and slowly lower your hips to the floor. The top of your left foot should be flat on the floor.
- Keep your hips level, with your weight distributed between them (avoid sinking into your right hip).
- From here, you can either remain upright — keeping your hands on the floor in front of you, your chest up, and your core engaged — or you can fold forward, slowly walking your hands out in front of you and lowering your chest to the floor.
- Hold the pose for 5-10 breaths, then switch sides and repeat.
- To come out of the pose, tuck your left toes under, press into your hands, and slowly bring your right foot back to the starting position.
2. Catcher’s Shift
- From a standing position, separate your feet wider than shoulder-width distance. Turn your toes out as far as is comfortable.
- Bend your knees coming into a low squat.
- Adjust the separation between your feet and the turnout of your toes to make sure you don’t feel any pain in your knees.
- Place your elbows on the insides of your thighs and press outward. Keep your chest lifted.
- Gently shifts your weight from right to left to feel a stretch in your hips.
3. Cow Face Pose
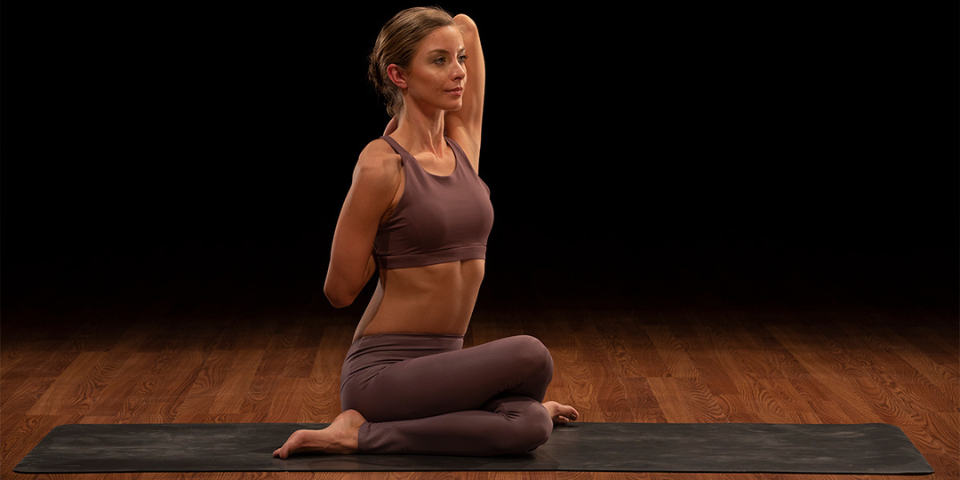
- Start in tabletop position: Get on all fours, with your hands directly below your shoulders and your knees directly below your hips.
- Cross your right knee over your left knee, and sit your hips back on to the floor, evenly distributing your weight on both butt bones. The sides of your feet should be on the floor, equidistant to either side of your pelvis.
- Reach your left arm out to the side and internally rotate it so your palm faces behind you, then bend your left elbow and work your left hand up your back without pulling your left shoulder down lower than the right. Your left fingers should point up toward your neck, palm still facing behind you.
- Extend your right arm toward the ceiling, and keep your biceps close to your ear as you bend your right elbow and reach down your back toward your left hand. Clasp them if possible.
- Hold for a minute, then gently reverse the pose and switch sides.
4. Rotating Hip Stretch
- Sit down on your knees with your hips to your heels.
- Place your right hand at a 45-degree angle, to the side, and behind your right hip.
- As you exhale, lift your hips, swinging your left arm across your body toward your right shoulder.
- Hold for a breath.
- Come back to center, lowering your hips to heels.
- Repeat on the left, holding for a breath. Continue to switch sides and breathe.
- To increase the stretch on the front of your hip, engage your abs and squeeze your glutes.
5. Happy Baby Pose

- Lie down on your mat, bend your knees, and place your feet flat on the floor with your hands at your sides.
- Explore the movement of your pelvis by alternating back and forth from a posterior tilt (tucking your tailbone up toward the ceiling) to an anterior tilt (extending your lower back).
- After moving from one tilt to the other, find a neutral pelvis position by moving your sit bones forward in the direction of your feet while maintaining some engagement in your abdomen.
- Draw your knees toward your chest, grab the backs of your thighs, and gently move your knees apart, lifting the soles of your feet toward the ceiling.
- Reach your arms between your legs, and grab the outer edges of your feet. You want your feet to be even from the inner edges to the outer edges as if standing on the ceiling.
- Pull your knees closer toward your chest, and bring your head, shoulders, and the backs of your triceps down toward the floor.
- Without forcing it, move deeper into the stretch by gently bringing your inner thighs down beside your ribs.
- Take a few long and soft breaths, feeling your back spread on to the mat as you simultaneously spread your collarbone wide across your chest.
- Slowly bring your knees back together, and lower your feet back to the floor.
6. Lying Scorpion Twist
- Lie down on your stomach.
- Place your hands beneath your shoulders, elbows bent.
- Lift your right leg, bring it over and across your left leg, touching your right toes to the ground outside your left hip.
- Press down into the ground with your left hand.
- You’ll feel a stretch all across your right side and front of your hip.
- Bring your right leg back to the floor and repeat on the left side.
7. Frog Pose
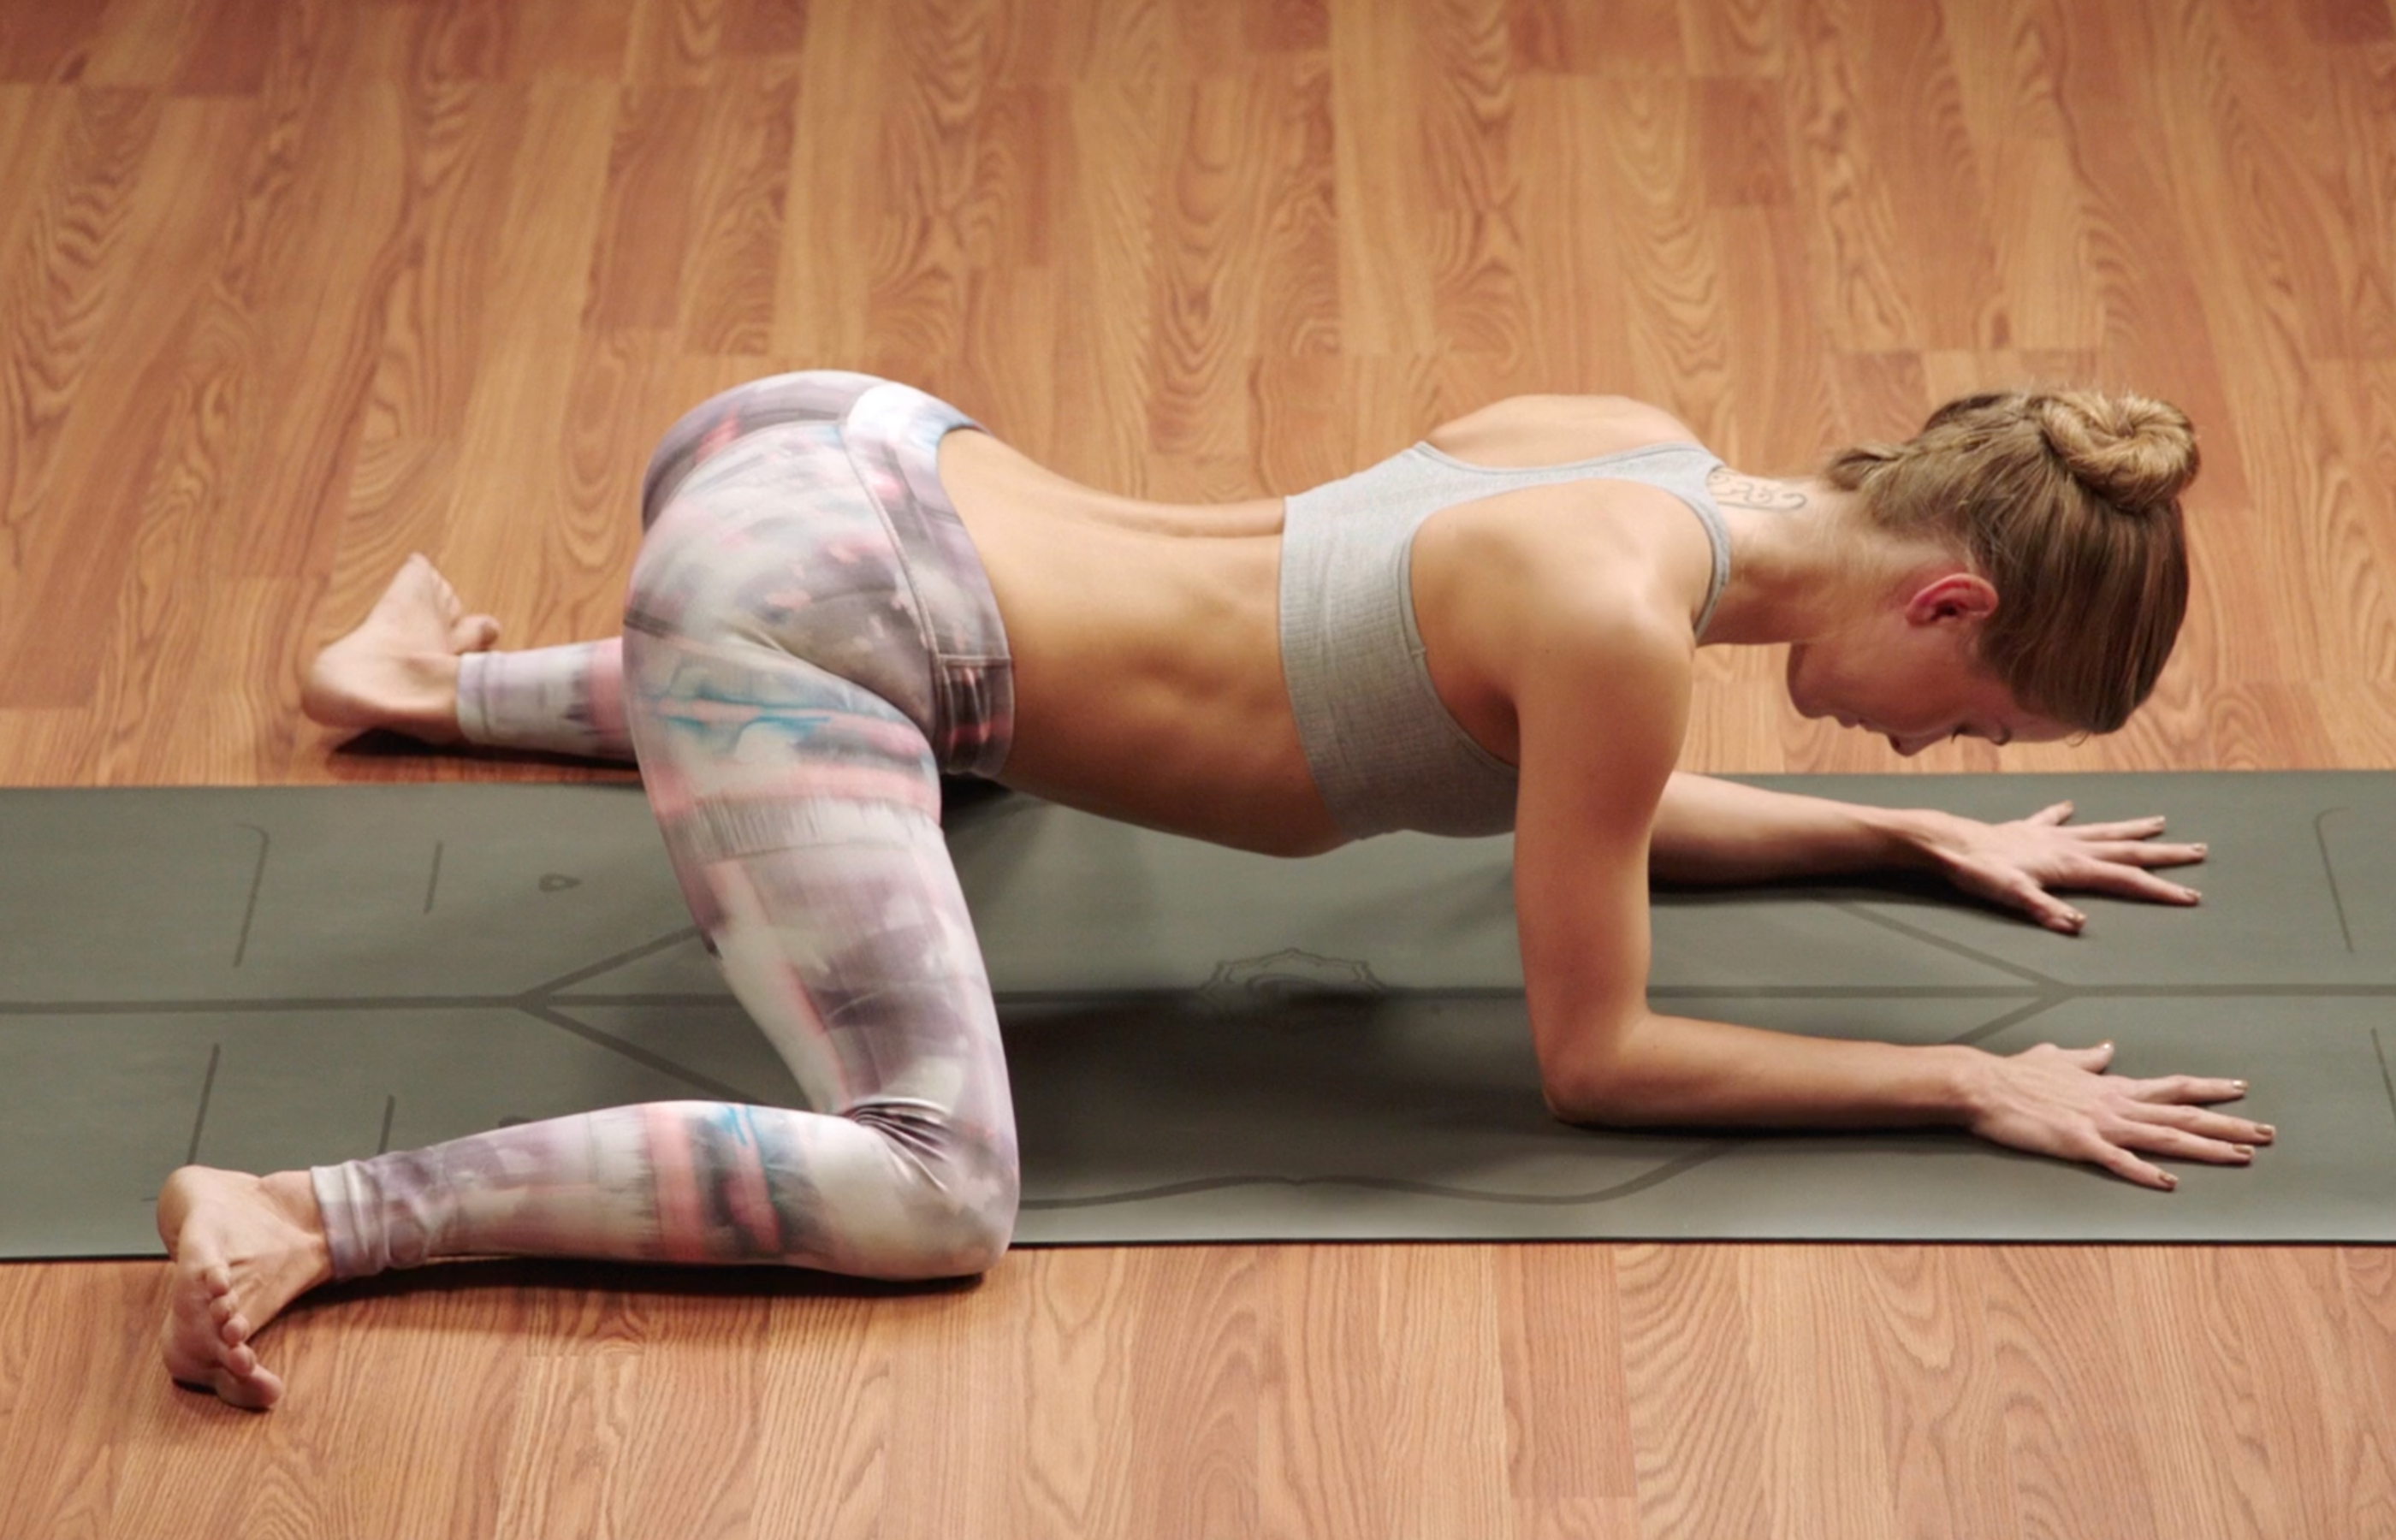
- Start in tabletop position: Get on all fours, with your hands directly below your shoulders and your knees directly below your hips.
- Slowly begin walking your knees out to the sides, keeping your feet flexed and your ankles directly behind your knees.
- Keeping your spine neutral, let your pelvis sink as the inside edges of your feet touch the mat. Come down onto your forearms, if comfortable.
- Let gravity do the work; just breathe and feel the stretch for five breaths.
- To come out of the pose, gently rock your hips forward, walk your knees in, and press from your palms back up to the starting position.
8. Butterfly Stretch
- Come to a seated position, placing the soles of your feet together and letting your knees fall wide to the sides.
- Bring your feet as close to your pelvis as possible, narrowing the angle of your knees.
- Adjust your seat to make sure both sit bones are touching the floor.
- Inhale, sit up straight and tall.
- With an exhale, fold forward maintaining a straight spine.
- The further forward you fold, the more intense of a stretch you’ll feel in the back of your hips and booty.
- If you have a partner at home, they can stand behind you and gently press down on your knees or back to deepen the stretch.
9. Bound Angle Pose
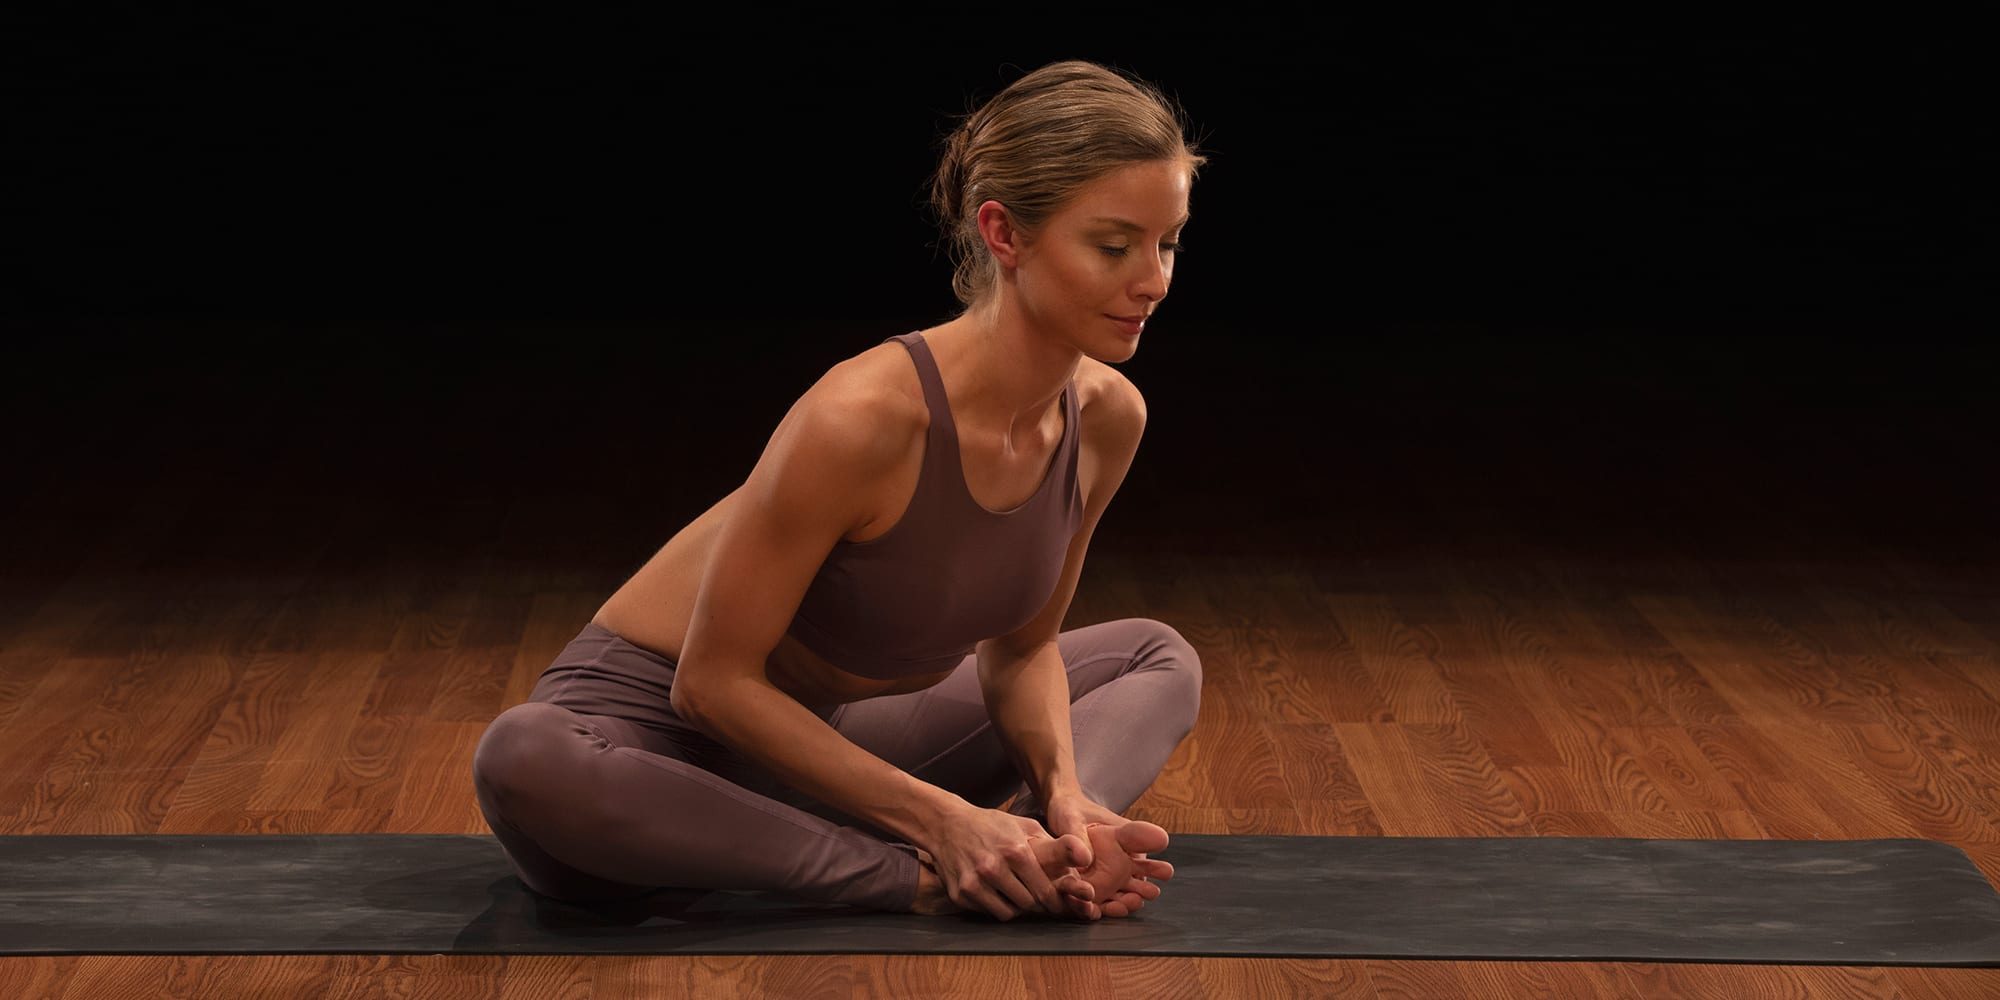
- Sit on the floor with your butt bones directly beneath you. (This keeps you from tucking your tailbone.)
- Bring the soles of your feet together, letting your knees fall to the sides. The outer edges of your feet should touch.
- Draw your heels as close to your groin as is comfortable.
- Place your thumbs on the balls of your feet, and wrap the rest of your fingers around the tops of your toes, as if holding an open book.
- Sit up as tall as you can, keep your gaze forward and your chest open, and hold for at least five breaths, up to one minute.
10. Runner’s Lunge
- Start from standing, feet together.
- Step your right leg back, taking a wide, split-leg stance. Keep your right toes tucked, balancing on the ball of your foot.
- Bend your left knee and bring your hands to the floor inside your left leg.
- If you’d like a deeper stretch, lower to your forearms, increasing the stretch on the front of your right leg and right hip flexor.
- Step your right leg forward and repeat on the other side by stepping your left leg back.
11. Low Crescent Lunge
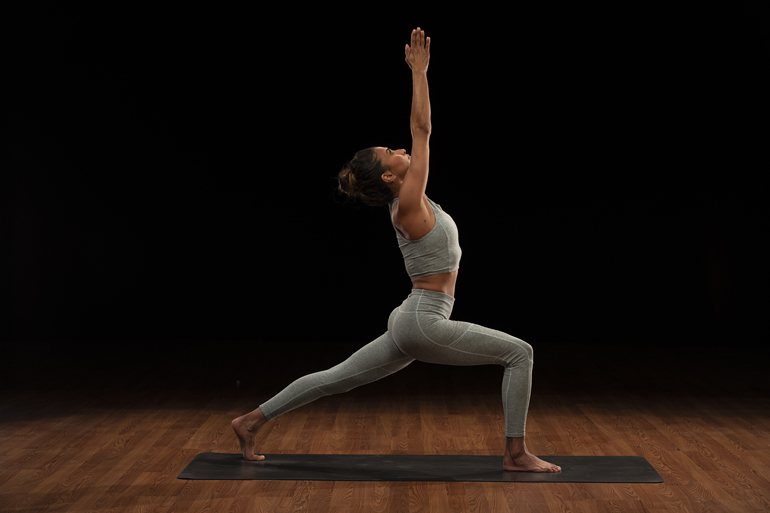
Set Up
- Begin downward-facing dog with your hands shoulder-width apart and your feet a few inches apart. Lift one foot off of the floor, bend the knee and drive it toward your chest, and step the foot in between your hands. Lower the back knee on to the mat, and untuck your toes so the top of your back foot is on the floor.
Getting Into The Pose
- Slide your back knee on the ground as far back as is comfortable. Keeping your front leg bent, lift your chest up and raise your arms to the ceiling.
Alignment
- Press your hips forward, and keep your front knee pointing straight forward and in line above your ankle. Square your hips so both hip bones are pointing forward. Engage your core. Lift your sternum to activate a slight back bend, but avoid crunching down into your back. Reach your arms high, and have the palms of the hands facing one another. Keep your shoulders pressed down.
12. Hip Quad Hamstring
- Start from standing. Step your right leg back into a low runners lunge. Place your hands on the ground on the inside of your left foot.
- Drop your right knee to the floor.
- Lift your chest, reach your hands to the sky to get a stretch across the front of your hip.
- Bring your hands down and bend your right knee, reaching your right hand back to try and grab your foot. Gently pull your foot toward your butt to get a stretch across your thigh and quad.
- Release your right foot, placing your hands on the ground inside your left foot.
- Draw your hips back, straightening your left leg.
- Lean forward until you get a stretch in your hamstring.
- Repeat from standing by stepping your left leg back.
13. Child’s Pose
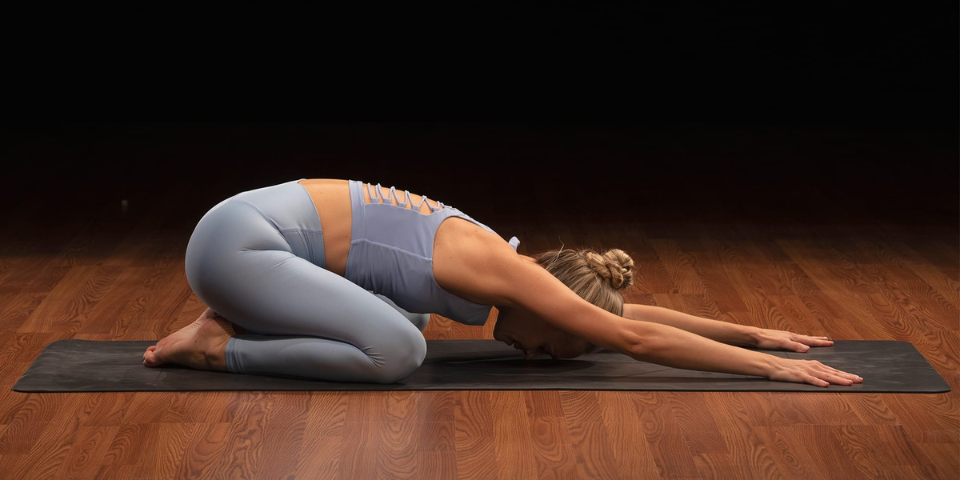
- Start on all fours, with your hands directly below your shoulders and your knees hip-width or wider. Bring your big toes together.
- Exhale and sink your hips back toward your heels. Rest your belly between your thighs and your forehead on your mat.
- Extend your arms out in front of you (palms down, to stretch the whole back) or along your sides (palms up, to stretch between the shoulders).
- How long you should hold the child’s pose depends on how much time you have. Stay for a few breaths up to a few minutes.